
Scheduling Scans
The information in this document applies to version 6.7 of Syhunt Hybrid.
How To Schedule a Scan
Adding and configuring a scheduled scan is an easy task:
- Click the Scheduled Scans icon
 in the launcher toolbar. The Scheduled Scans screen will open.
- Click the Add Scheduled Scan icon
 in the Scheduled Scans screen toolbar.
- Enter a reference name for the new scheduled scan (like MyScan) and hit OK. A preferences dialog window will open.
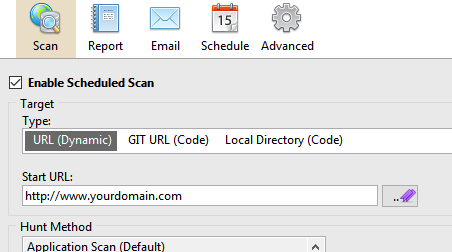
- In the Scan tab, enter the scan target details and select the desired scan method and options.
- In the Report tab, enter the desired report generation options.
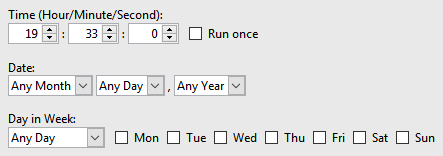
- In the Schedule tab, enter the desired event plan.
- Click the OK button when you're done.
Sending Reports Via Email
Firstly, you have to add an Email tracker:
- Click the Issue Trackers icon
 in the launcher toolbar. The Issue Trackers screen will open.
- Click the Add Tracker icon
 in the Issue Trackers screen toolbar and choose the Add tracker: Email menu option.
- Enter a reference name for the new tracker (like Mail) and hit OK. A preferences dialog window will open.
- Enter Sender/Recipient email addresses.
- Enter the SMTP Authentication host and credentials and click the OK button.
- Click the Scheduled Scans icon in the launcher toolbar. The Scheduled Scans screen will open.
- Right-click the scheduled scan and click the Edit Schedule Preferences option. A preferences dialog window will open.
- Go to the Email tab and check the Automatically email report after generation option.
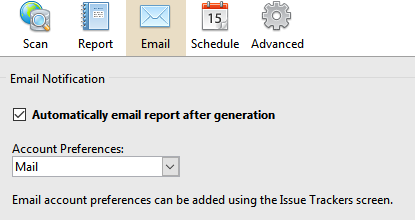
- Select the account preferences.
- Click the OK button when you're done.
Reviewing results from scheduled scans
At any time you can see the results of past and current scans and generate a report. Just launch the Syhunt Hybrid application and click the Past Sessions icon in the launcher toolbar.
Working with Third-Party Launchers and Schedulers
See this document on how to start Syhunt from within third-party task schedulers, Jenkins and other launchers

For additional product documentation, visit syhunt.com/docs