Syhunt Hybrid: POC Test Plan
The information in this document applies to version 7.0.3 of Syhunt Hybrid. This testing plan was designed for Syhunt Hybrid, the full-featured edition, and not Syhunt Community - because of restricted functionality and vulnerability checks in Community, some test cases are impossible to be performed and not all vulnerabilities will be detected.
Introduction
This software test plan is aimed at verifying the functionality, accuracy and correct working of all key aspects and parts of Syhunt Hybrid. The testing is to be conducted at customer's premises after Syhunt Hybrid has been deployed and activated and involves performing dynamic and static scans under various conditions to simulate actual usage of the tools. Upon completion, the user should be familiar with key product functionality and integration capabilities, and Syhunt be able to collect usability feedback from the user.
Test Categories
Environmental Requirements
The results from this POC test plan were obtained on a Windows 10 x64 installation with an Intel Core i7, 16GB RAM, 500GB SSD and Internet access. Please make sure that you have a fast SSD, Internet access, and that at least the minimal system requirements are met (see the requirements). This testing plan assumes that Syhunt Hybrid is already installed on the Windows machine that will execute the tests. If not, please continue reading this section.
Click the executable setup download link provided by Syhunt. After downloading the exe file, double-click its icon to launch it. It's an easy next-next-finish installation process. When you click Finish, Syhunt Hybrid will be launched and you will be prompted to enter a Pen-Tester Key - enter the one provided in the email message containing the download link. After you click OK, a success message indicates that the Syhunt is ready for testing and you should immediately see the Launcher screen.
Prey Server
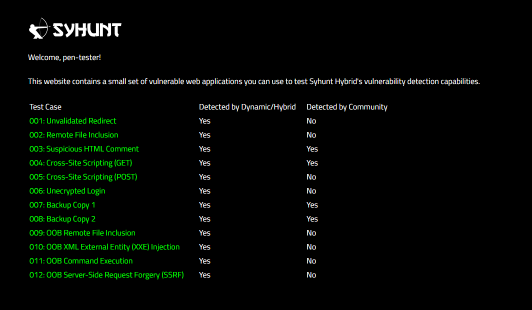
The Prey server is a portable Apache PHP web server containing a set of vulnerable web applications for demonstration purposes.
- Download it from https://syhunt.fra1.cdn.digitaloceanspaces.com/tools/hybrid_xtras/syhunt-vulnphpserver.zip
- Unzip it to a directory of your choice
- Run PreyServer.exe to launch it
- Run mysql\start.exe to launch the MySQL server.
- Finally, open http://127.0.0.1/syhunt/vulndemo in the browser and you will see the welcome page:
GIT for Windows
If you execute any GIT related test case, you will need to install Git for Windows, which can be downloaded at https://gitforwindows.org/
After installing it with its default settings, make sure the git command is available through the Command Prompt - type git and hit enter.
Estimated Scan Time
Dynamic scans from Phase 1 will take approximately 3 minutes to complete each one when executed against the recommended targets. The incremental scan described in section D5 should take half this time.
Source code scans from Phase 2 will take approximately 10 seconds to complete when executed against the recommended targets. A code scan against a larger code base (not the ones listed in this document), like a Java+JavaScript project containing around 200K lines will take around 4 minutes to complete. An incremental scan of the same codebase can reduce the scan time by half. This means that Syhunt can analyze around 6 million lines of code per hour and around 12 million lines of code per hour in recurring scans against the same targets.
Phase 1: Dynamic Auditing
D1: Scan a live website for vulnerabilities
| Action | Expected Results |
| Scan http://127.0.0.1/syhunt/vulndemo for vulnerabilities FOLLOW THE STEPS BELOW | After the scan completes, the results tab must list all test cases detected (from 001 to 011)  |
- Make sure the Prey server is running (as explained in the Environment Requirements section at the beginning of this document)
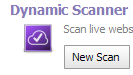
- Launch Syhunt Hybrid and click the Syhunt Dynamic icon or New Scan button in the welcome page.
- Enter the http://127.0.0.1/syhunt/vulndemo as the target URL.

- Select the Application Scan (Default) hunt method, which scans for all vulnerabilities using the recommended settings.
- Click the Start Scan button
D2: Manually login via browser and scan a restricted website for vulnerabilities
| Action | Expected Results |
| Scan http://127.0.0.1/syhunt/restricted, which uses web form authentication, for vulnerabilities FOLLOW THE STEPS BELOW | After the scan completes, the results tab must list all test cases (from 001 to 003) 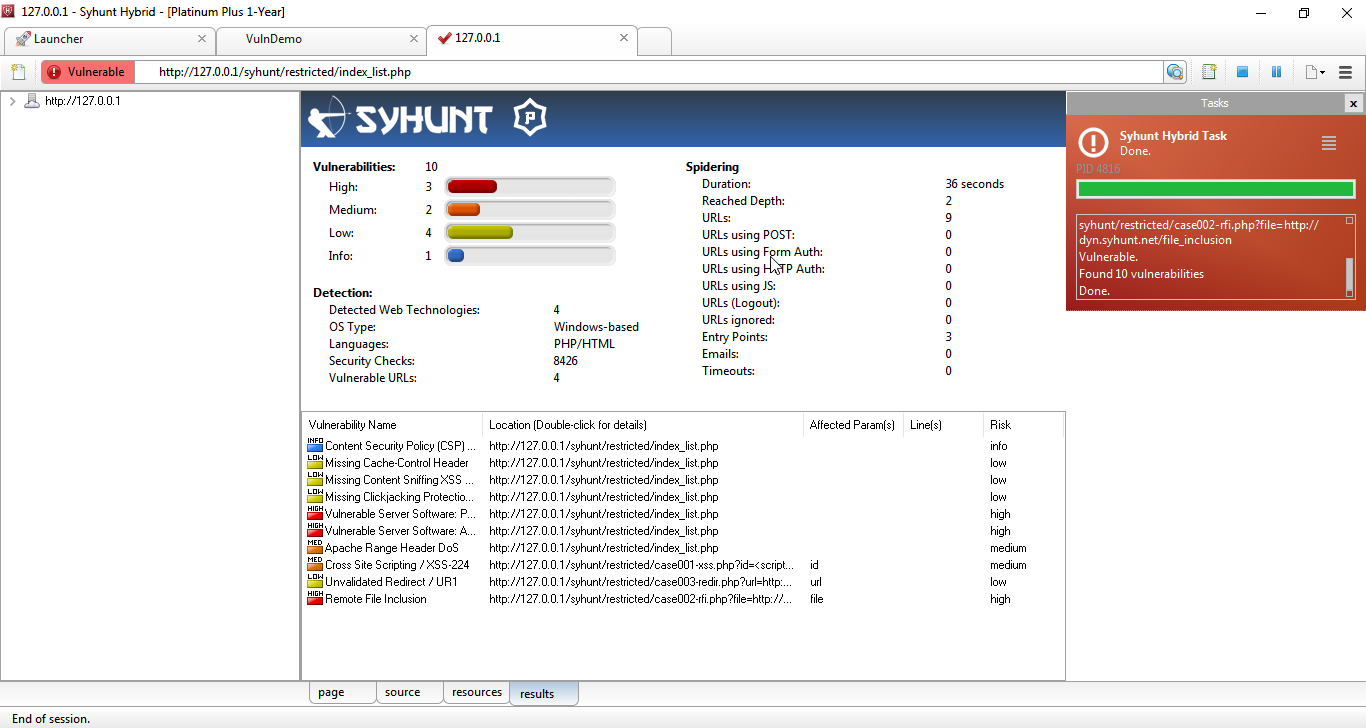 |
- Make sure the Prey server is running (as explained in the Environment Requirements section at the beginning of this document)
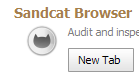
- Launch Syhunt Hybrid and double-click the Sandcat Browser icon or New Tab button in the welcome page.
- Navigate to http://127.0.0.1/syhunt/restricted - enter the URL using the address bar and press Enter.
- Go to the Login area and login using the following credentials: username test, password CUBPzjVy
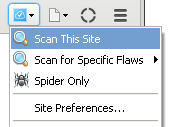
- Click the Scan This Site menu option to start the scan.
- Select the Application Scan (Default) hunt method, which scans for all vulnerabilities using the recommended settings.
- Click the Start Scan button to launch the scan
D3: Automatically login and scan a restricted website for vulnerabilities
| Action | Expected Results |
| Scan http://127.0.0.1/syhunt/restricted_b, which uses basic authentication, for vulnerabilities FOLLOW THE STEPS BELOW | After the scan completes, the results tab must list all test cases detected (from 001 to 003) 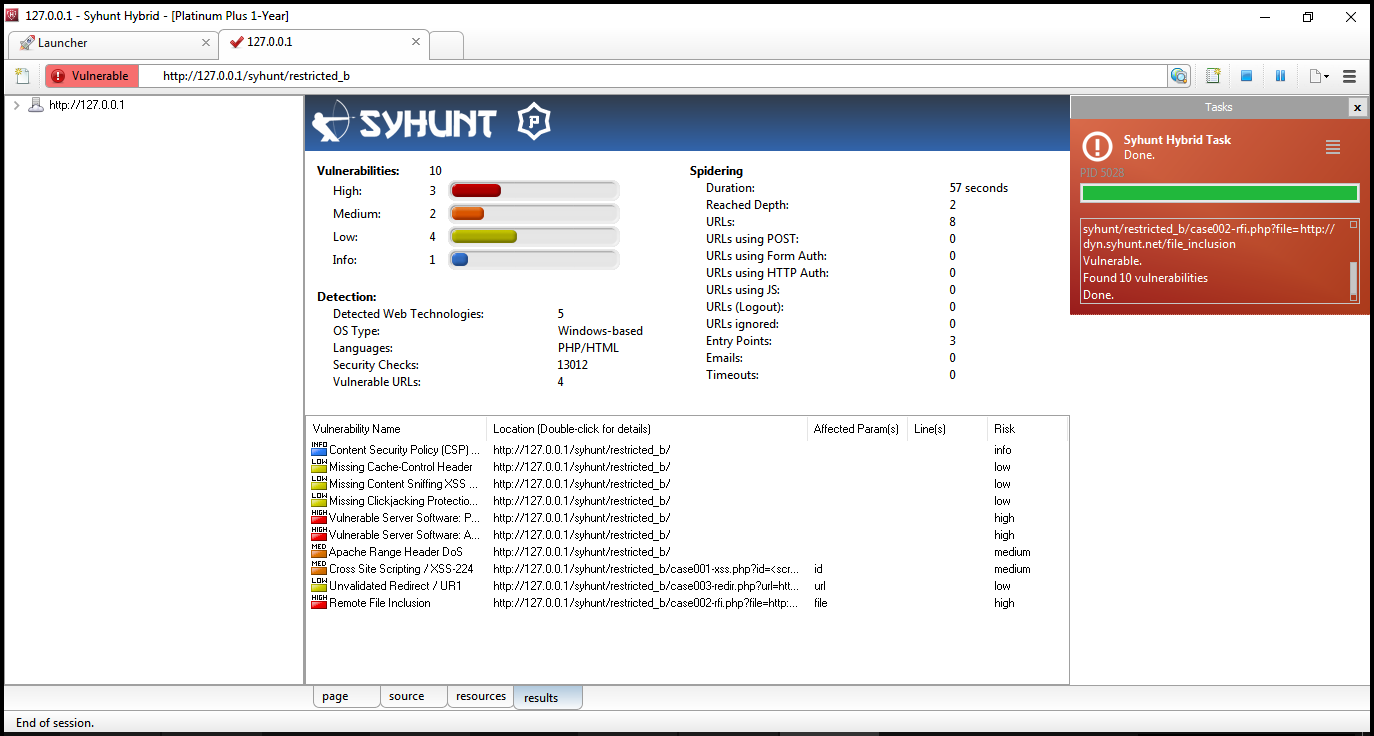 |
- Make sure the Prey server is running (as explained in the Environment Requirements section at the beginning of this document)
- Launch Syhunt Hybrid and click the Syhunt Dynamic icon or New Scan button in the welcome page.
- Enter the http://127.0.0.1/syhunt/restricted_b as the target URL.

- Select the Application Scan (Default) hunt method, which scans for all vulnerabilities using the recommended settings.
- Check the option Edit site preferences before starting scan
- Click the Start Scan button
- In the next dialog, go to the Authentication tab. Switch Server Authentication from None to Basic
- Enter username test and password test
- Click the Ok button to launch the scan
D4: Just map a website (crawling/spidering test with JavaScript execution)
| Action | Expected Results |
| Scan http://test.syhunt.com/spider FOLLOW THE STEPS BELOW | After the scan completes, the site tree (left sidebar) when expanded must list alongside the site structure, all test cases (from 001 to 009) under the /passed/ directory 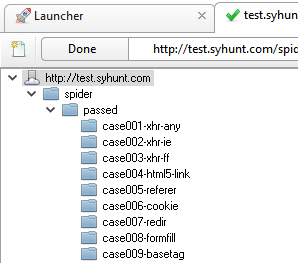 |
- Launch Syhunt Hybrid and click the Syhunt Dynamic icon or New Scan button in the welcome page.
- Enter the http://test.syhunt.com/spider as the target URL.
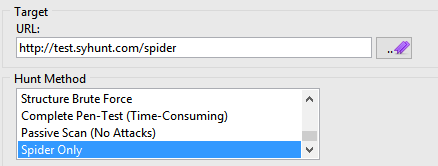
- Select the Spider Only hunt method
- Click the Start Scan button.
D5: Perform an incremental dynamic scan
| Action | Expected Results |
| Scan http://127.0.0.2/syhunt/vulndemo twice FOLLOW THE STEPS BELOW | The first scan should take around 4min to complete. The second one should take half this time (aprox. 2min) to complete. After each scan completes, the results tab must list all test cases detected (from 001 to 011) 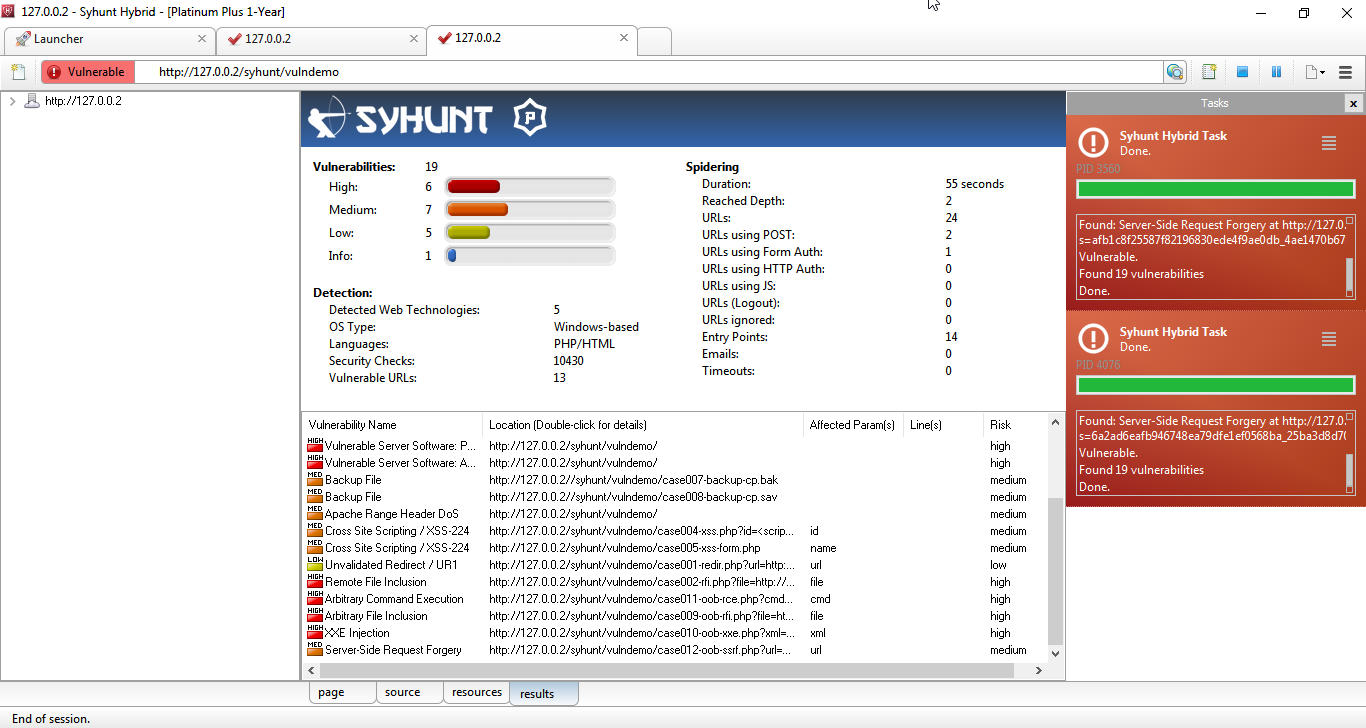 |
- Follow the steps described in section D1, but use 127.0.0.2 instead of 127.0.0.1 as target because incremental scans are not enabled against 127.0.0.1.
- Repeat the steps described in section D1 to perform a scan against 127.0.0.2.
D6: Perform a concurrent dynamic scan
| Action | Expected Results |
| Perform a concurrent scan against http://127.0.0.1/syhunt/vulndemo FOLLOW THE STEPS BELOW | After the scan completes, the results tab of each scan must list all test cases detected (from 001 to 011). The right sidebar will show the scan status of each scan marked in red. |
- Follow the steps described in section D1.
- Before the scan ends, go back to the Launcher tab and repeat the steps 2 to 5 described in section D1 to start a second scan against the same target.
Phase 2: Source Code Auditing
S1: Scan local source code files for vulnerabilities
| Action | Expected Results |
| Launch a code scan against a local directory via graphical user interface FOLLOW THE STEPS BELOW | After the scan completes, the results must list all test cases (from 001 to 009) |
- Download https://github.com/syhunt/vulnphp/archive/master.zip and unzip it to C:\Vulnerable\PHP\ or a directory of your preference
- Launch Syhunt Hybrid and click the Syhunt Code icon or New Scan button in the welcome page.
- Select the directory you unziped master.zip
- Make sure the Code Scan (default) hunt method is selected
- Press the Start Scan button to launch the scan.
You can try the above procedure with vulnerable samples in different languages:
| Java | https://github.com/syhunt/vulnjava-wavsep/archive/master.zip |
| Lua | https://github.com/syhunt/vulnlua/archive/master.zip |
| PHP | https://github.com/syhunt/vulnphp/archive/master.zip |
Note: the number of test cases in each archive may vary.
S2: Scan remote GIT repositories for vulnerabilities
| Action | Expected Results |
| Launch a code scan against a remote GIT repository FOLLOW THE STEPS BELOW | After the scan completes, the results must list all test cases (from 001 to 009) |
- Launch Syhunt Hybrid and click the Syhunt Code icon or New Scan button in the welcome page.
- Select type GIT URL and enter the URL: https://github.com/syhunt/vulnphp.git
- Make sure the Code Scan (default) hunt method is selected
- Press the Start Scan button to launch the scan.
You can try the above procedure with vulnerable samples in different languages:
| Java | https://github.com/syhunt/vulnjava-wavsep.git |
| Lua | https://github.com/syhunt/vulnlua.git |
| PHP | https://github.com/syhunt/vulnphp.git |
Note: the number of test cases in each archive may vary.
Phase 3: Integration
N1: Launch a code scan via command-line interface
| Action | Expected Results |
| Launch a code scan against https://github.com/syhunt/vulnphp via command-line interface FOLLOW THE STEPS BELOW | After the scan completes, the results must list all test cases (from 001 to 009) |
- Go to the directory Syhunt Hybrid is installed using the command prompt.
- Use the following command-line (with the -gr parameter, so that it can generate a report):
Scancode https://github.com/syhunt/vulnphp.git -gr
N2: Launch a dynamic scan via command-line interface
| Action | Expected Results |
| Launch a dynamic scan against http://127.0.0.1/syhunt/vulndemo via command-line interface FOLLOW THE STEPS BELOW | After the scan completes, the results must list all test cases (from 001 to 011) |
- Make sure the Prey server is running (as explained in the Environment Requirements section at the beginning of this document)
- Go to the directory Syhunt Hybrid is installed using the command prompt.
- Use the following command-line (with the -gr parameter, so that it can generate a report):
Scanurl 127.0.0.1/syhunt/vulndemo -gr
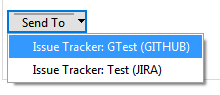
N3: Create a tracker issue based on a reported vulnerability
| Action | Expected Results |
| Create a GitHub issue based on a reported vulnerability FOLLOW THE STEPS BELOW | After adding a GitHub tracker and submitting a vulnerability, your GitHub repository will list the vulnerability as an issue |
- Create a GitHub.com account, if you don't have one, and create a test repository
- Add a GitHub tracker in Syhunt as explained in Integrating Syhunt with JIRA and GitHub
- Go to the menu
 -> Past Sessions option
- Right click a session with status Vulnerable and click the View Vulnerabilities option
- Check the vulnerability you want to send to GitHub
- Click the button SendTo -> Your tracker name to submit the vulnerability
N4: Generate a F5 BigIP ASM compatible export
| Action | Expected Results |
| Generate a ASM export file for a scan FOLLOW THE STEPS BELOW | After clicking the Save button, the browser will open the compatible XML file which you can then import in BigIP ASM |
- Go to the menu -> Past Sessions option
- Right click a session with status Vulnerable and click Generate Report option
- Select Complete report template option
- Click the Save Report button (at the bottom right corner of the tab)
- Select Save as type XML ASM Generic Scanner Format and finally click the Save button
Phase 4: Reporting
R1: Generate a standard HTML report for a scan session
| Action | Expected Results |
| Generate a report for a scan using CVSS3 vulnerability sorting method FOLLOW THE STEPS BELOW | After clicking the Save button, the browser will open the HTML report file 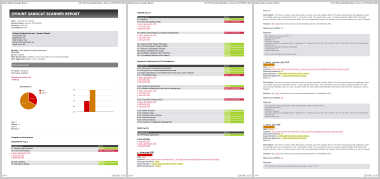 |
- Go to the menu -> Past Sessions option
- Right click a session with status Vulnerable and click Generate Report option
- Select Standard report template option (if not already selected)
- Select CVSS vulnerability sorting method option (if not already selected)
- Click the Save Report button (at the bottom right corner of the tab) and finally the Save button
R2: Generate a complete HTML report for a scan session
| Action | Expected Results |
| Generate a report for a scan using CVSS3 vulnerability sorting method FOLLOW THE STEPS BELOW | After clicking the Save button, the browser will open the HTML report file |
- Go to the menu -> Past Sessions option
- Right click a session with status Vulnerable and click Generate Report option
- Select Complete report template option
- Select CVSS vulnerability sorting method option (if not already selected)
- Click the Save Report button (at the bottom right corner of the tab) and finally the Save button
R3: Generate a XML results export for a scan session
| Action | Expected Results |
| Generate a XML results file for a scan FOLLOW THE STEPS BELOW | After clicking the Save button, the browser will open the XML results file 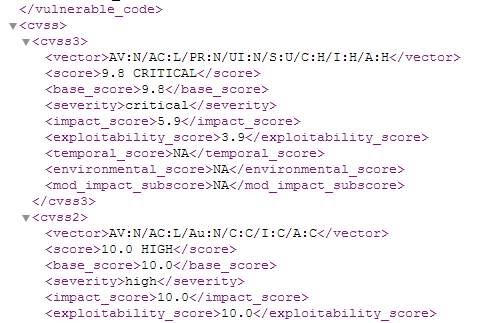 |
- Go to the menu -> Past Sessions option
- Right click a session with status Vulnerable and click Generate Report option
- Select Complete report template option
- Click the Save Report button (at the bottom right corner of the tab)
- Select Save as type XML File and finally click the Save button
R4: Edit the information about a reported vulnerability
| Action | Expected Results |
| Edit the information about a reported vulnerability FOLLOW THE STEPS BELOW | See the vulnerability edit screen. After editing and confirming the changes, if you generate a report, it will contain the edited information 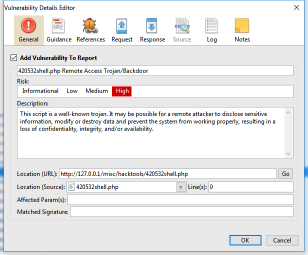 |
- Go to the menu -> Past Sessions option
- Right click a session with status Vulnerable and click the View Vulnerabilities option
- Double-click a vulnerability item
- Change the vulnerability description as you wish. Go to the Notes tab and also add some notes
- Click the OK button to save changes
R5: Generate a comparison report between scan sessions
| Action | Expected Results |
| Generate a comparison report between two scan sessions FOLLOW THE STEPS BELOW | A report must be generated with the same contents from the comparison screen, which should list test cases 007 to 009 as removed 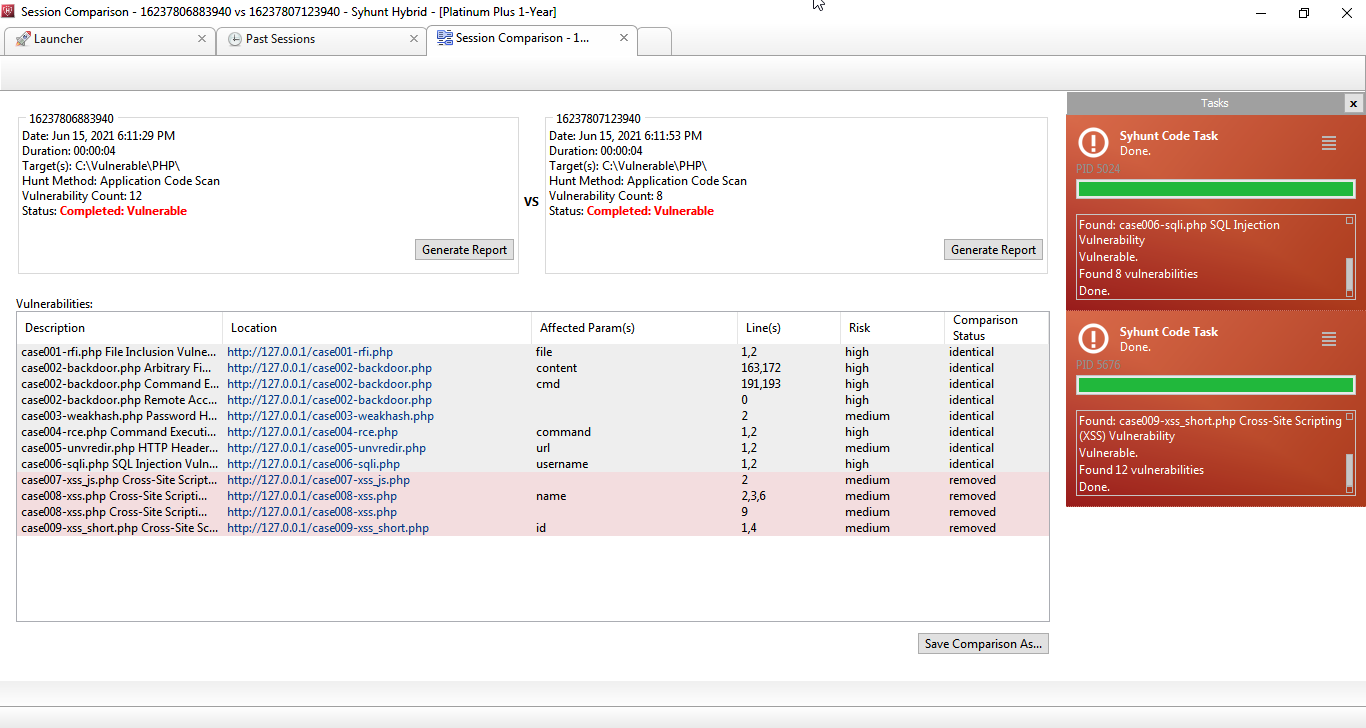 |
- Follow the steps described in section S1.
- After completing the scan, go to the directory where you saved the vulnerable samples and delete test cases 007 to 009.
- Scan the directory again as explained in section S1.
- Go to the menu -> Past Sessions option
- Check the two last scan sessions and click the Compare Sessions toolbar icon:

- Click the Save Comparison As button (at the bottom right corner of the tab) and finally click the Save button
For additional product documentation, visit syhunt.com/docs